Machine Setup
Install the tools you need before starting Jekyll development. This guide covers macOS, Windows, and Linux.
Prefer a guided setup? The Site Builder runs these same checks live on your machine, shows the install command for your OS, and then walks you through configuring and launching a complete site with Claude alongside. This page is the manual reference behind its Prerequisites step.
flowchart LR
    A([Start]) --> B[Install Docker Desktop]
    B --> C[Install Git]
    C --> D[Configure Git]
    D --> E[Install GitHub CLI]
    E --> F[Authenticate gh]
    F --> G([Ready for Jekyll Setup])
Prerequisites at a Glance
| Tool | macOS | Windows | Linux | Required? |
|---|---|---|---|---|
| Docker Desktop | brew install --cask docker |
winget install Docker.DockerDesktop |
get.docker.com | Yes |
| Git | brew install git |
winget install Git.Git |
apt install git |
Yes |
| GitHub CLI | brew install gh |
winget install GitHub.cli |
pkg install | Yes |
| VS Code | brew install --cask visual-studio-code |
winget install Microsoft.VisualStudioCode |
snap install code --classic |
Recommended |
Step 1 — Install Docker Desktop
Docker runs your Jekyll site in an isolated container so you never fight Ruby version conflicts.
macOS (Homebrew)
Windows (Winget)
Linux
curl -fsSL https://get.docker.com | sh
sudo usermod -aG docker $USER
newgrp docker          # apply group without logging out
Verify:
Step 2 — Install Git
macOS
Windows
Linux
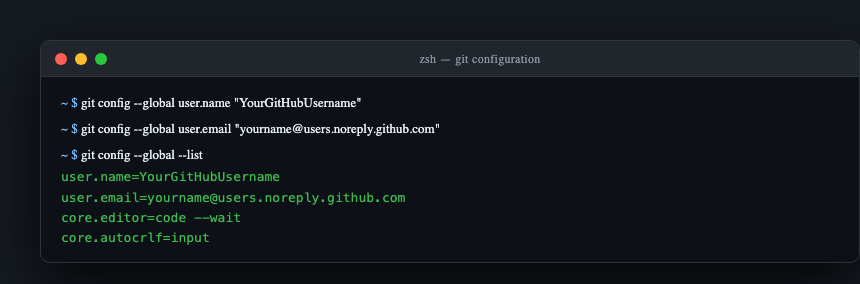
Step 3 — Configure Git
Replace the values below with your real GitHub username and the no-reply email from github.com/settings/emails:
git config --global user.name "YourGitHubUsername"
git config --global user.email "ID+username@users.noreply.github.com"
git config --global core.editor "code --wait"
Verify:
Step 4 — Install GitHub CLI
macOS
Windows
Linux
sudo apt install gh        # Debian/Ubuntu (after adding the gh apt repo)
# Full instructions: https://cli.github.com/manual/installation
Authenticate:
gh auth login
# Choose: GitHub.com → HTTPS → Login with a web browser
# Copy the one-time code shown, press Enter, paste in the browser
Step 5 — Install VS Code (Recommended)
macOS
Windows
Linux
Useful extensions for Jekyll work:
code --install-extension redhat.vscode-yaml
code --install-extension yzhang.markdown-all-in-one
code --install-extension sissel.shopify-liquid
code --install-extension ms-vscode-remote.remote-containers
code --install-extension ms-azuretools.vscode-docker
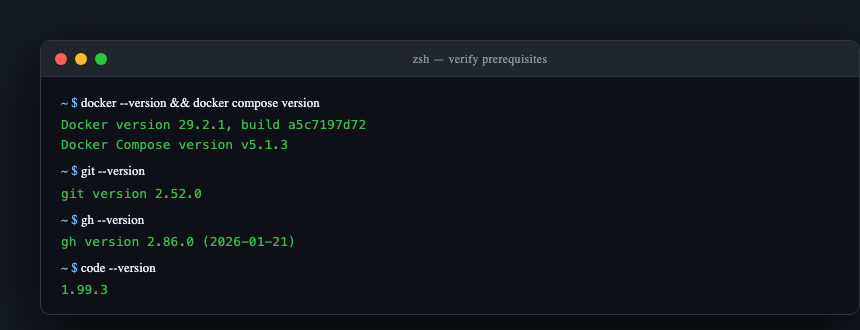
Verify Everything
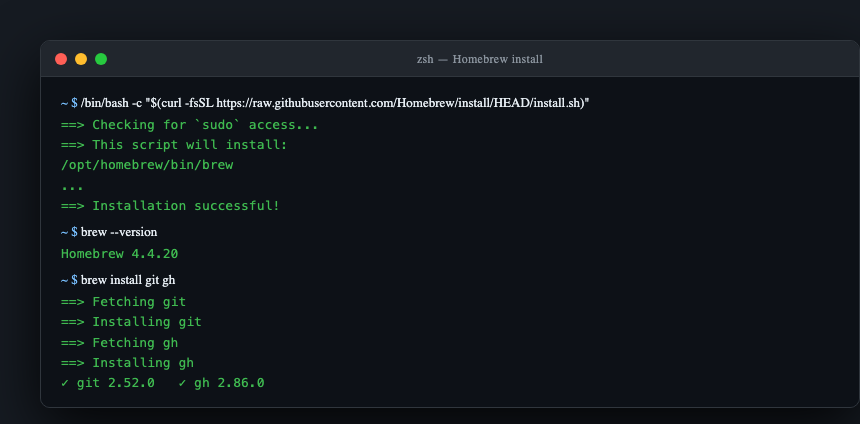
macOS: Install All Tools with Homebrew
If you're on macOS and don't have Homebrew yet, install it first:
Then install everything in one go:
Troubleshooting
Docker: permission denied (Linux)
Docker Desktop won't start (Windows)
Ensure Hyper-V or WSL 2 is enabled. Run wsl --install in an elevated PowerShell, then restart.
Port 4000 already in use
Related
- Site Builder — the guided path that runs these prerequisite checks for you.
- Site Builder reference — what the wizard generates, the tools it exposes, and its safety boundaries.
- Jekyll Setup — the next step once these tools are installed.